Loading... ## Centos7搭建Multicraft我的世界服务器控制面板教程  暑假快到了,有一些MC的玩家想搭建国际版服务器,但是不会搭建.今天我写了一个网页服务器控制面板的搭建教程,PE,PC服务器都可以开哦~ 介四面板登录页面 (还没汉化,背景这个版本暂时改不了,想要美化现在只能选2.2.0,介个版本是2.2.1) 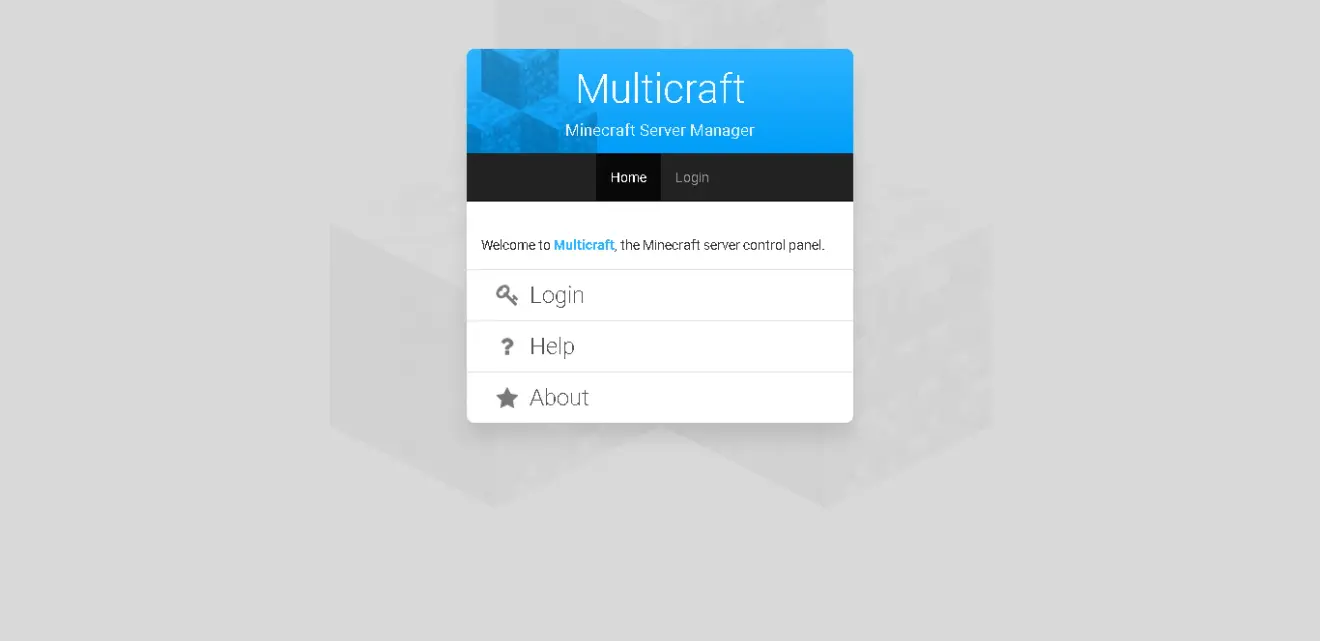 这个面板接触过服务器的应该都用过这个面板,很好用,大部分人都不知道它的原名‘Multicraft’,因为这些原本的内容都被改了,就连版权都可以改的.我见过一些萌新搭建面板,老是出问题,然后花钱找人搭建,搭建一次大概30-50元.说白了无知被骗,那么简单的东西也要花钱代搭?所以我写了一个傻瓜式教程. 我们选用Centos7来搭建服务器控制面板,因为Centos系统的效率高,当然Windows系统也可以,但推荐用Centos,如果一定要Windows的话,Windows Server系统最好不过.Windows安装教程还要教?不必了吧! ## 一、准备工作 - 能上网的电脑/(安卓)手机,电脑上需要装 Xshell6 Xftp6 Notepad++ 这三个工具;手机上需要装 JuiceSSH ES文件浏览器 这两个工具. - 一台Centos7的服务器,最低2G内存,服务器可以去阿里云/腾讯云等正规的租,或者自己砸点钱买台服务器放到机房托管 1、服务器环境搭建 (1)更换阿里云的yum源 (可选) ```c cd /etc/yum.repos.d/ yum -y install weget wget http://mirrors.aliyun.com/repo/Centos-7.repo mv Centos-7.repo CentOs-Base.repo yum clean all yum makecache ``` (2)更新系统 ```c yum -y update ``` (3)关闭并禁止开机启动防火墙&selinux ```c systemctl stop firewalld systemctl disable firewalld ``` (4) 用winscp文件浏览器连接你的服务器 文件目录:/etc/selinux/config 下载到本地打开,把SELINUX=enforcing 改成 SELINUX=disabled 上传覆盖 (5) 重启服务器 ```c reboot ``` 等待几十秒就可以重新连接了 ## 二、环境准备 (6)搭建mysql数据库 ```c wget http://dev.mysql.com/get/mysql57-community-release-el7-8.noarch.rpm yum localinstall mysql57-community-release-el7-8.noarch.rpm yum -y install mysql-community-server ``` (7)启动MySQL服务&设置mysql开机启动 ```c systemctl start mysqld systemctl enable mysqld systemctl daemon-reload ``` (8)配置默认编码为utf8&修改密码策略 [不需要复杂密码可以禁用] *修改密码策略-在/etc/my.cnf文件中添加validate_password_policy配置,指定密码策略 *选择0(LOW),1(MEDIUM),2(STRONG)其中一种,选择2需要提供密码字典文件 ```c validate_password_policy=0 ``` *如果不需要密码策略,添加my.cnf文件中添加如下配置禁用即可,如下所示: ```c [mysqld] validate_password = off ``` (9)配置默认编码为utf8-修改/etc/my.cnf配置文件,在[mysqld]下添加编码配置,如下所示: ```c [mysqld] character_set_server=utf8 init_connect='SET NAMES utf8' ``` (10)重新启动mysql服务使配置生效: ```c systemctl restart mysqld ``` (11)修改root本地登录密码 ```c 查看默认密码 grep "password" /var/log/mysqld.log 显示:A temporary password is generated for root@localhost: hilX0U!9i3_6#密码 ``` (12)登录数据库 ```c mysql -uroot -p ``` a.提示输入密码: hilX0U!9i3_6 修改密码为‘2233’ ```c set password for 'root'@'localhost'=password('2233'); ``` b.创建名字为‘bilibilihuanzuo’数据库 ```c create database bilibilihuanzuo; ``` c.退出mysql数据库 ```c exit; ``` (13)Multicraft安装环境搭建 安装多个Multicraft需要的依赖项,如Apache、PHP和OpenJDK(依次安装) ```c yum -y install httpd php php-common php-gd php-mbstring php-ldap php-odbc php-pear php-xml php-xmlrpc php-bcmath php-mysql php-pdo wget vim tar zip curl java-1.8.0-openjdk ``` ## 三、下载并安装Multicraft面板 1、执行安装 ```c wget http://www.multicraft.org/files/multicraft-2.2.1-64.tar.gz -O multicraft.tar.gz tar -zxvf multicraft.tar.gz cd multicraft ./setup.sh #这个可以下载自己想要的版本,现在只提供2.2.0版本,Multicraft-2.2.0版本下载: http://share.weiyun.com/5PwEKvT ``` 以下为输出: ```c ################################################################################ *** Welcome to Multicraft! ################################################################################ This installer will help you get Multicraft up and running. No changes are made to the system until all of the required information has been collected. NOTE: This script automates the installation as described on the Multicraft website. Use it at your own risk. Run each Minecraft server under its own user? (Multicraft will create system users): [y]/n 回车 Run Multicraft under this user: [minecraft] 回车 User not found. Create user 'minecraft' on start of installation? [y]/n 回车 Install Multicraft in: [/home/minecraft/multicraft] 回车 If you have a license key you can enter it now: [no] 回车 If you control multiple machines from one web panel you need to assign each daemon a unique number (requires a Dynamic or custom license). Daemon number? [1] 回车 Will the web panel run on this machine? [y]/n 回车 User of the webserver: [apache] 回车 Location of the web panel files: [/var/www/html/multicraft] /var/www/html 回车 Please enter a new daemon password (use the same password in the last step of the panel installer) [none] 回车(bug:密码无法输入,该版本可以在web安装环节中输入密码) Enable builtin FTP server? [y]/n 回车 IP the FTP server will listen on (0.0.0.0 for all IPs): [123.xxx.xx.xxx] 0.0.0.0 回车 IP to use to connect to the FTP server (external IP): [123.xxx.xx.xxx] 回车 FTP server port: [21] 2121 回车(改端口是防止共享IP用户端口被占用) Block FTP upload of .jar files and other executables (potentially dangerous plugins)? [n]/y y 回车 MySQL is the recommended database type but it requires you to have a MySQL server available. SQLite is more light weight and it will work fine for small installations up to 10 servers. For multiple daemons on a single panel MySQL is required. What kind of database do you want to use? [sqlite]/mysql mysql 回车 NOTE: This is for the daemon config, the front end has an installation routine for database configuration and initialization. Database host: [127.0.0.1] 回车 Database name: [multicraft_daemon] bilibilihuanzuo 回车 Database user: [root] (勿改) 回车 Database password: [] 2233 回车 密码看不见,但非之前那个bug *** *** Please use the web panel to initialize the database. *** which: no unzip in (/usr/local/sbin:/usr/local/bin:/usr/sbin:/usr/bin:/root/bin) Path to unzip program: [/usr/bin/unzip] 回车 NOTE: Any running daemon will be stopped! Ready to install Multicraft. Start installation? [y]/n 回车 ################################################################################ *** INSTALLING ################################################################################ Creating user 'minecraft'... done Creating directory '/home/minecraft/multicraft'... done Ensuring the home directory exists and is owned and writable by the user... done Installing 'bin/' to '/home/minecraft/multicraft/'... done Installing 'jar/' to '/home/minecraft/multicraft/'... done Installing 'launcher/' to '/home/minecraft/multicraft/'... done Installing 'scripts/' to '/home/minecraft/multicraft/'... done Installing 'ssl/' to '/home/minecraft/multicraft/'... done Installing 'templates/' to '/home/minecraft/multicraft/'... done Installing 'eula.txt' to '/home/minecraft/multicraft/'... done Installing 'multicraft.conf.dist' to '/home/minecraft/multicraft/'... done Installing 'default_server.conf.dist' to '/home/minecraft/multicraft/'... done Installing 'server_configs.conf.dist' to '/home/minecraft/multicraft/'... done Cleaning up files... done Installing license key... done Generating 'multicraft.conf'... done Setting owner of '/home/minecraft/multicraft' to 'minecraft'... done Setting special daemon permissions... done Creating directory '/var/www/html'... done Installing web panel files from 'panel/' to '/var/www/html'... done Setting owner of '/var/www/html' to 'apache'... done Setting permissions of '/var/www/html'... done Applying SELinux contexts... done Temporarily starting daemon to set DB permissions: Multicraft 2.2.1 - Minecraft Server Manager Daemon Loading configuration from /home/minecraft/multicraft/multicraft.conf Starting daemon Permissions set, exiting. ################################################################################ *** Installation complete! ################################################################################ PLEASE READ: 1) Before starting the daemon you need to run the web panel installer to initialize your database. (example: http://your.address/multicraft/install.php) 2) After running the web panel installer you can start the daemon using the following command: /home/minecraft/multicraft/bin/multicraft start For troubleshooting please see: - Daemon log file: /home/minecraft/multicraft/multicraft.log - Panel log file: /var/www/html/protected/runtime/application.log - Multicraft Website: http://www.multicraft.org/site/docs/troubleshooting Press [Enter] to continue. 回车 In case you want to rerun this script you can save the entered settings. Save entered settings? ([y]/n) 回车 Saving settings to 'setup.config'... done IMPORTANT: Make sure this file is not accessible by unauthorized users. ``` *正如你所看到的,我们可以使用默认设置,最后一行确认将在您的Centos7服务器上启动Multicraft的安装.所以前面如果设置错了用Ctrl+c断开安装配置,再启动./setup.sh重新配置安装 2、Apache环境配置 现在安装脚本并不能完成我们所需要访问的Multicraft面板的网页,下面的附加步骤是必需的。 a.启动httpd ```c systemctl start httpd ``` b.设置访问权限 ```c chown -R apache.apache /var/www/html ``` c.调整Apache默认的设置为允许.htaccess重写 ```c awk '/AllowOverride None/{c++;if(c==2){sub("AllowOverride None","AllowOverride All");c=0}}1' /etc/httpd/conf/httpd.conf > /tmp/httpd.conf; mv -f /tmp/httpd.conf /etc/httpd/conf/httpd.conf ``` d.设置开机启动httpd并重启 ```c systemctl enable httpd systemctl restart httpd ``` 3.回到网页端(重点) *现在困难的部分已经过去了,我们只需要从web界面完成Multicraft的安装,然后启动脚本 *访问web界面,我们只需在浏览器栏中输入服务器的IP地址 例如:‘http://192.168.10.43’,从这里我置们将完成Multicraft最后的配置 在Web页面你会看到Multicraft的设置,点击‘Start Installation’开始安装来开始最后的安装过程 配置1 如果这里全是绿色,表示你的Apache已经设置好了,然后点击‘Continue’进入下一个设置,如果有红色,请返回Apache环境配置——调整Apache默认的设置为允许.htaccess重写,重新输入该栏命令 配置2 继续点击‘Continue’ 配置3 点击‘Initialize Database’ 配置4 输入我们之前创建的数据库名字&修改的数据库密码 配置5 输入好后点击‘Save’保存,然后会刷新页面,点击‘Continue’ 配置6 之后就会显示默认的面板账号: root和密码: root,点击上方黑色菜单栏的‘Login’登录 配置7 登录好后直接点击‘Continue’,进入下一页再次输入数据库名字账号和密码 配置8 点击’Save‘保存 配置9 点击‘Initialize Database’初始化数据库,刷新页面后点击‘Continue’ 配置10 这里要解决之前Bug留下的密码问题,详细请看下载并安装Multicraft面板的安装内容注释,在‘Password for Deamon connections’一行写入密码‘2233’后,点击‘Save’保存,进入最后一步. 配置11 终于到最后一步了 是不是很开森? 启动Deamon /home/minecraft/multicraft/bin/multicraft start 配置12 成功启动会显示如下内容: Multicraft 2.2.1 - Minecraft Server Manager Daemon Loading configuration from /home/minecraft/multicraft/multicraft.conf Starting daemon 再点击‘Refresh’刷新Deamon状态后点击‘Continue’,进入下页,会提示为了安全起见,删除‘install.php’,该文件路径:/var/www/html/install.php 我们只需要输命令删除就可以了 rm -rf /var/www/html/install.php 最后点击‘Continue to Multicraft’进入主页 自己搭建注意事项 Database name: [multicraft_daemon] 所填的名字要与创建的数据库名字相同 Database user: [root] root千万别改勿改 Database password: [] 密码要与数据库密码一致 - 共享IP/net2ftp内置FTP服务器连接不了的童鞋们看这里 - 共享IP会导致端口占用,并且Multicraft内置的net2ftp需要的随机连接端口更是多到天际,共享IP分配不到那么多端口怎么办呢?难道就这样废了? - 答案是否定的,我们可以设置net2ftp的随机端口数的大小 下载到本地/home/minecraft/multicraft/multicraft.conf 修改找到FTP服务器设置 [launcher] 一栏 ```c Format: 2100-2120 default: 2100-2120 ftpPasvPorts = 2100-2120 default: 2121 ftpPort = 2121 ``` 保存 上传覆盖 重启Deamon ```c /home/minecraft/multicraft/bin/multicraft restart ``` 最后修改:2024 年 08 月 29 日 © 允许规范转载 打赏 赞赏作者 支付宝微信 赞 如果觉得我的文章对你有用,请随意赞赏

2 条评论
2025年10月新盘 做第一批吃螃蟹的人coinsrore.com
新车新盘 嘎嘎稳 嘎嘎靠谱coinsrore.com
新车首发,新的一年,只带想赚米的人coinsrore.com
新盘 上车集合 留下 我要发发 立马进裙coinsrore.com
做了几十年的项目 我总结了最好的一个盘(纯干货)coinsrore.com
新车上路,只带前10个人coinsrore.com
新盘首开 新盘首开 征召客户!!!coinsrore.com
新项目准备上线,寻找志同道合 的合作伙伴coinsrore.com
新车即将上线 真正的项目,期待你的参与coinsrore.com
新盘新项目,不再等待,现在就是最佳上车机会!coinsrore.com
新盘新盘 这个月刚上新盘 新车第一个吃螃蟹!coinsrore.com
不错不错,我喜欢看 https://www.jiwenlaw.com/